9 Easy Ways to Make Your Boat Interior Look Lighter and Bigger

Saltwater Journal is reader supported.
When you buy through our links we may earn an affiliate commission (at no extra cost to you)
A dark and cramped interior can make a boat feel uninviting and unappealing. If you’re sitting below deck surrounded by dark wood and with little natural light, and the vibe is about as good as a cold dungeon, you want to know “How do I make it better than this?”. Now while a boat’s primary function is practical — stay afloat, keep us safe, transport us from A to B, it’s natural as human beings (especially if you’re living aboard) to want to create a homely space that feels good too. How do you do that in a small boat so full of personal items, cruising gear and boat systems? The great news is there are clever and easy ways to revamp your boat interior so it feels more spacious.
And while most of us have to balance the budget and prioritise boat jobs, I’m here to reassure you that you don’t need to feel guilty about investing time and money in making your home onboard enjoyable to relax in.
The happier you are below deck the longer you’ll want to spend onboard — making the time, sacrifice and effort all worth it. Something I can confirm after completing our first yacht interior makeover. To maximise your living space the key areas to focus on are organisation, colour, fabric and lighting. Below you’ll be guided through each of these elements. With a little creativity and some strategic thinking, you can use these easy visual tricks to transform your boat.
1. Clear clutter and get organised
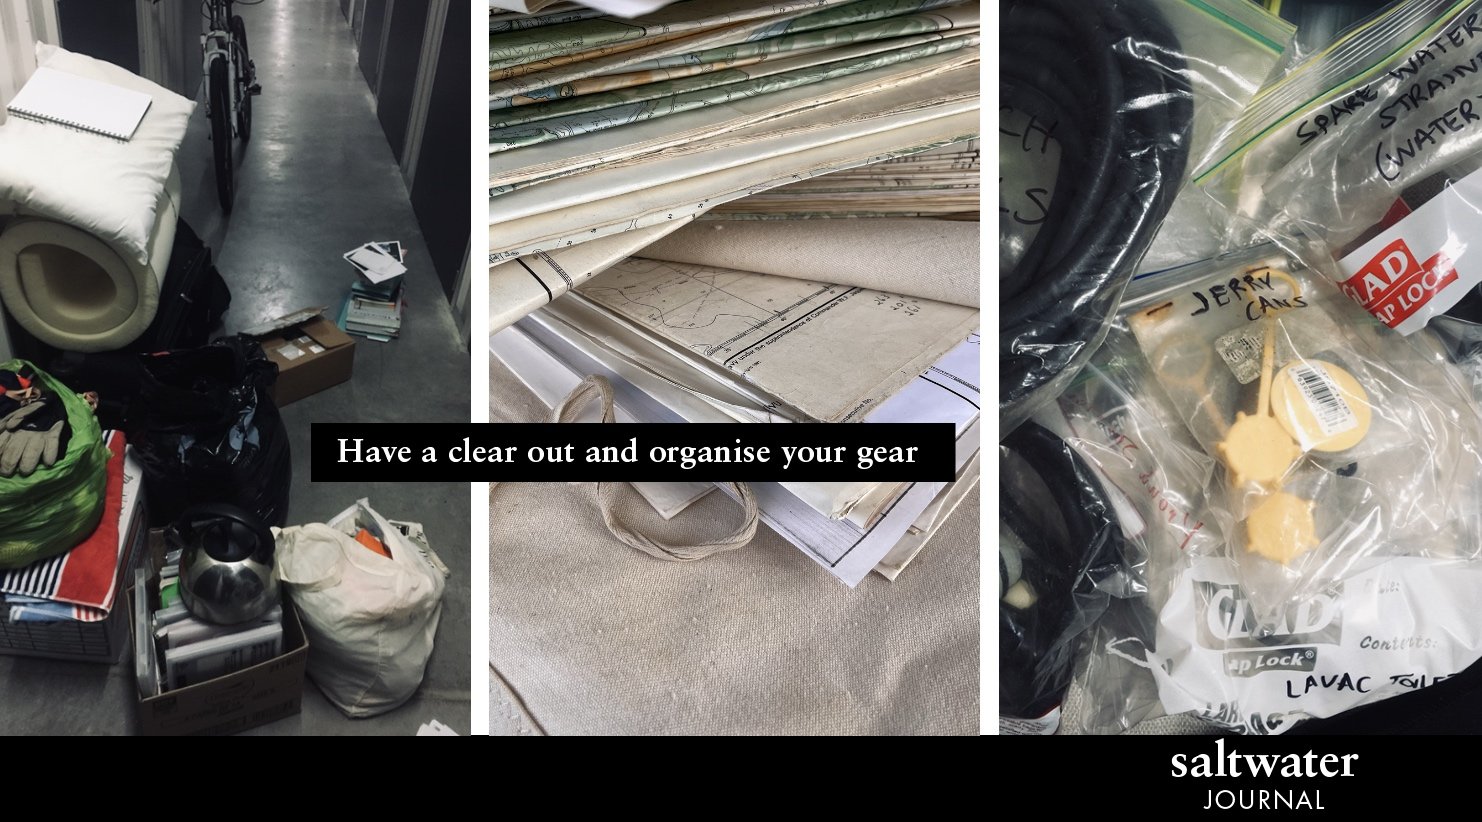
First of all, clear out all the visual clutter and get rid of anything you don’t need. This might sound obvious, but you’ll be surprised how much you accumulate over time, and how much space you can gain by having a good clear out. My Marie Kondo boating philosophy is if you don’t love it, and it doesn’t save your life then it’s up for grabs. Organising your boat can be a can of worms, as sorting one cupboard turns into having to sort another — the next minute the whole boat is pulled apart but it needs to be done!
Sort out gear into collections of boat things that make sense together eg: Wet weather gear and laundry things, tools and spare parts, food storage, clothes, bedding, charts and navigation tools.
Donate anything decent to a local thrift store
Recycle as much as you can
Use plastic containers, small jars, ziplock bags, baskets and vacuum storage bags to keep things organised.
Challenge your Tetris skills to pack gear away into logical spaces around the boat — using all your cupboards, lockers and sneaky spaces to keep things orderly, secure and out of sight.
Deep clean as you go
Take the opportunity to wipe out cupboards, dig into the dark corners of lockers and get rid of dust, mould and any funky remnants of past life onboard. Having a clean boat will keep you healthier onboard and cleaner surfaces reflect light might better.
Tip: Use white vinegar and a dash of warm water as an excellent cheap and natural cleaner to cut through built up dust and grime.
Once your interior space is organised and clean, it’s much easier to assess what you’re going to do next and move on to update the colour scheme.
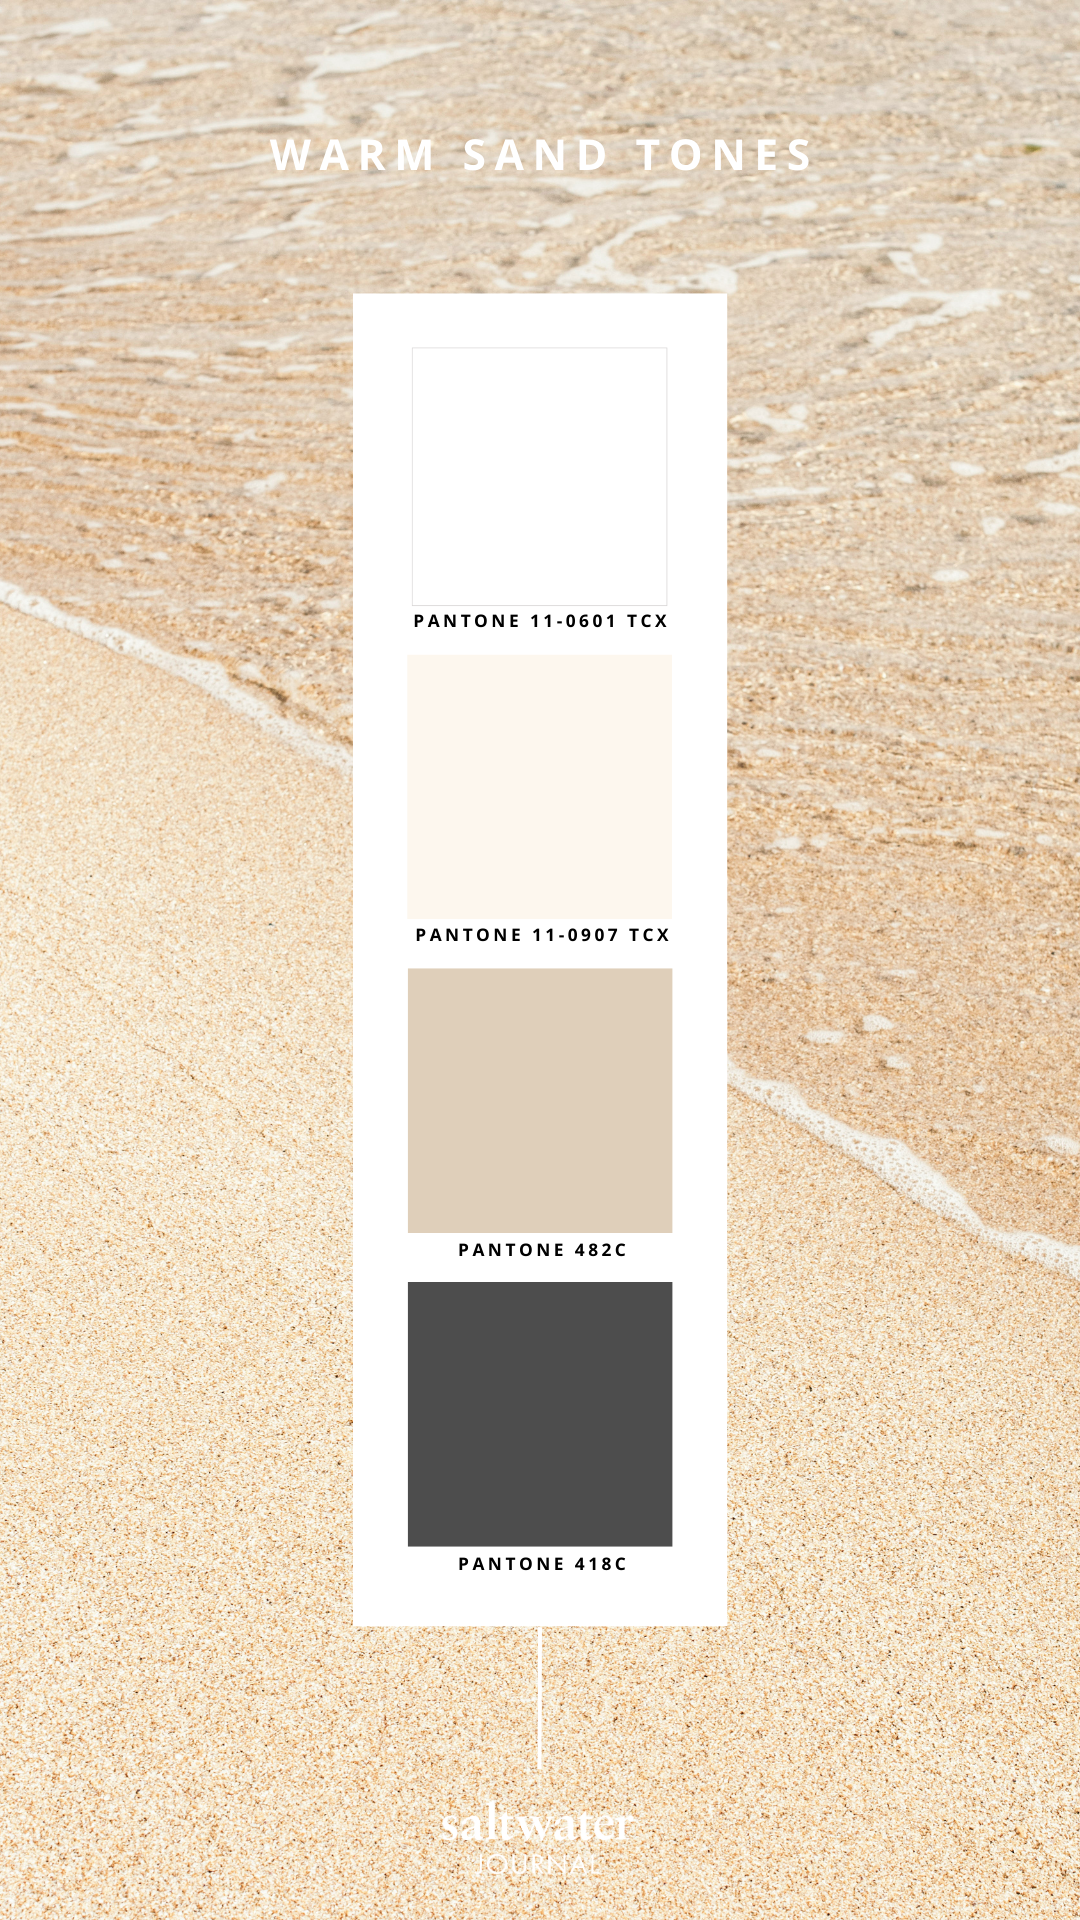
2. Pick a light colour scheme
Another easy way to help your boat interior feel more spacious and airy is to choose light, cool colours or delicate warm hues for a colour scheme. Choose colours in the same family and incorporate a tone-on-tone look across your walls and upholstery to create a more open feeling onboard.
Here’s three light, natural colour palettes for inspiration.
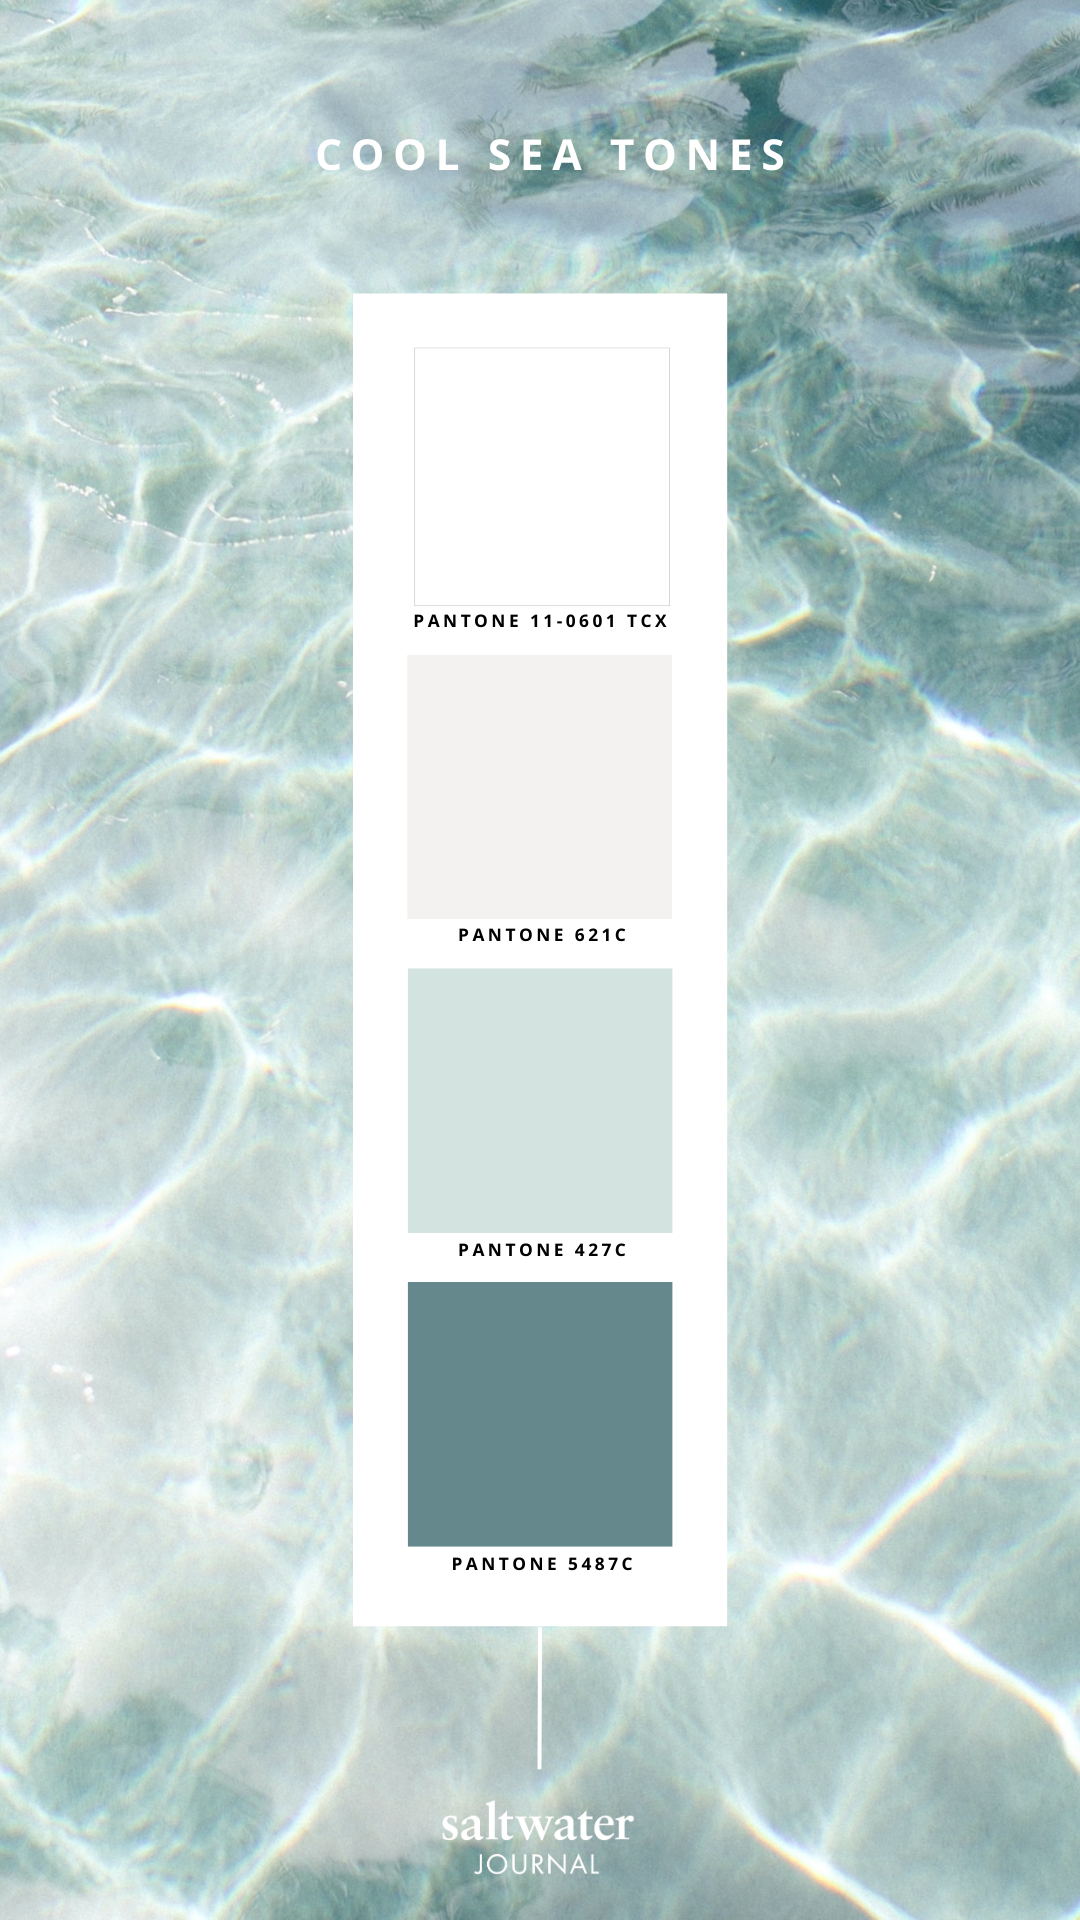
A local paint store will be able to work from the Pantone codes to create these colours for you.

3. Paint the walls a light colour
Painting a lighter colour throughout your boat will reflect natural light and onboard lighting. The higher the gloss finish of a paint, the more reflection you’ll get. I recommend a semi-gloss paint finish like eggshell or satin which reflect light while hiding any slight imperfections in the surface.
Older boats often have a dark wood interior with heavy layers of varnish. It is entirely possible with the right preparation (and yes, some hard work*) to sand back the varnish and repaint the surface in a colour of your choosing. If your boat has a lot of dark wood you don’t have to get rid of it all. You may just select a few key walls to paint, and retain some wooden features to keep the character of the boat. You may find some strong opinions against painting wood but it’s your space to do what you like with, so do what makes you happy — it’s your boat.
* DIY painting preparation is hard work and I titled this blog ‘easy ways’ so if you’re feeling miffed I understand. But on a level of difficulty, I believe (more often than not) that working with the boat you’ve got is a much easier process than selling up, and spending a lot more money and hours working to pay for a different boat.
4. Consider painting the ceiling white
Typically, painting a ceiling a darker colour than the walls will make the ceiling feel closer and the room smaller. That’s the opposite of what we want for your space! So painting the ceiling a lighter colour than the walls is an easy way to draw the eye upward and make the boat ceiling feel higher (and the room bigger). A bright white ceiling is most commonly used to create an airy feeling in a house, and it works well in a boat interior too.
See the painting FAQs below for the best paint to use onboard.
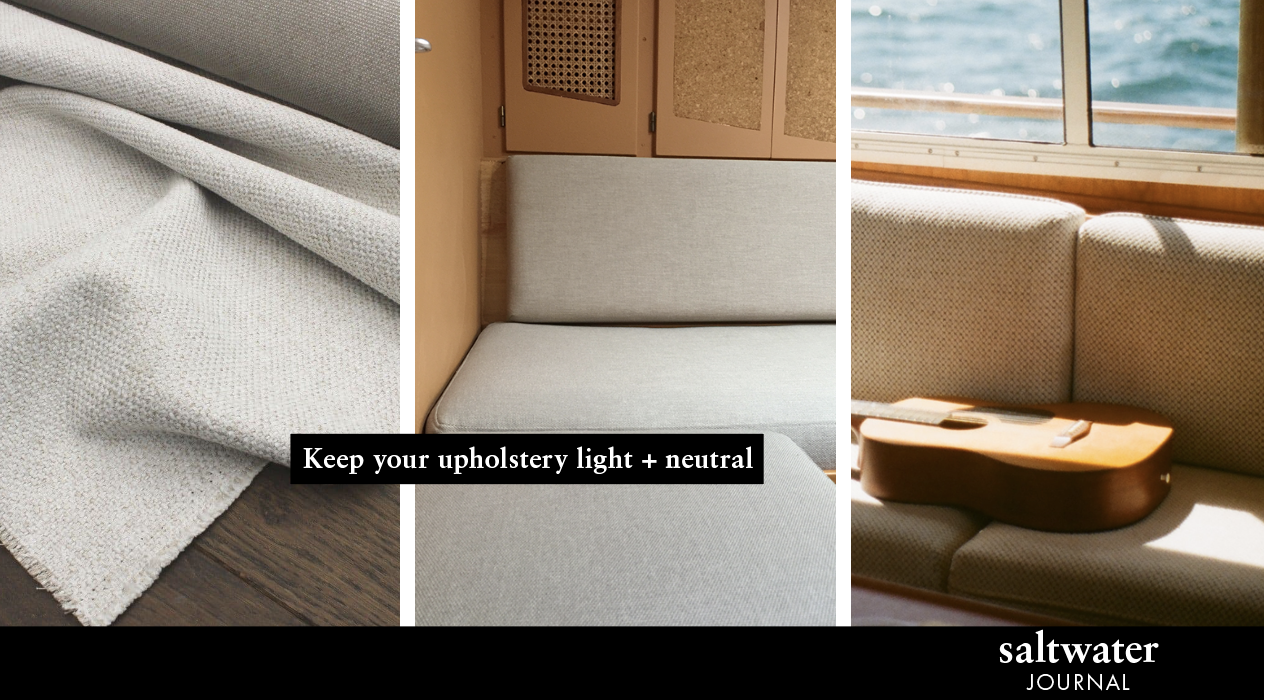
5. Select light coloured upholstery
Of course, you can choose whatever colour or pattern that you love for your upholstery, but not all fabric will have the same effect in a small space. Stripes are popular in the nautical world, but they can visually dominate small boat saloons. Bold prints do work in some tiny spaces but only if there’s plenty of light (bigger prints are better than smaller prints for the illusion of space).
Choose light, neutral coloured fabrics for settees and cushions to open up the space and help reflect light.
These look timeless and you can add more character through personal items and other decor. There are many options for high-quality stain, dirt and water resistant upholstery fabrics so don’t panic about having a lighter fabric onboard. You can always throw a blanket down on the settee while unpacking or moving gear around onboard (the place everything tends to get stacked while a boat job is done!).
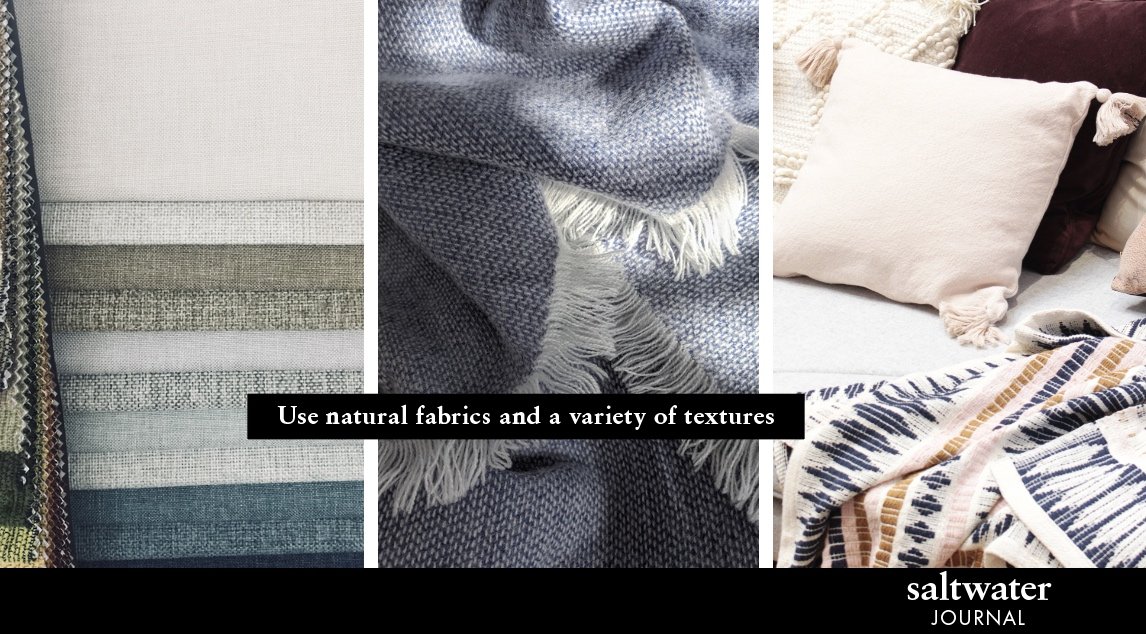
6. Play with texture
A key element of your interior design revamp is adding texture for cosiness and personality. Using tone-on-tone natural fabrics is a great way to do this. Play with a mix of textures from wool blankets, linen fabric and woven cushions — all breathable, washable, durable and comfortable. Look at the features of your boat space — perhaps there’s some lovely native wood features, or brass compass or nautical element you can contrast with.
Create visual interest by combining a range of textures. Think rough and smooth, shiny and matt. Add some fur, or fringes — have fun with it!
7. Add strategic lighting
Use new lighting to your advantage to create warmth, space and atmosphere. If you don’t have a lot of natural light through windows or hatches, you may be able to add more cabin lighting and swap out old fixtures for brighter, energy-efficient bulbs. Think where accent lighting could be added to highlight specific features of your boat’s interior. A simple way to do this is by illuminating the edges of the cabin with strips of 12V LED lights. These strip lights are easy to install and an excellent way to brighten darker recessed areas. These can be tucked out of sight for indirect light, adding a gorgeous ambiance. Improved, more strategically placed lighting also makes your boat safer to use and more enjoyable (no more tripping in the dark, or wearing a head torch trying to read a book!).
Tip: A higher LED count per meter of strip gives a smoother more unified light but of course will use more power too. Common LED densities are 30/60/120 LEDs per meter (9/18/36 LEDs per foot).


8. Ditch the curtains
I’m guessing if you’re wanting to fix a dark space onboard, then there are few exterior windows — and small ones at that. Curtains add extra bulk to the space and removing these keeps the space visually simple. So if you’ve got curtains definitely remove those! If privacy is an issue, there’s slimline covers for hatches and portholes. Even a black yoga mat cut to size works well to blackout light and add insulation.
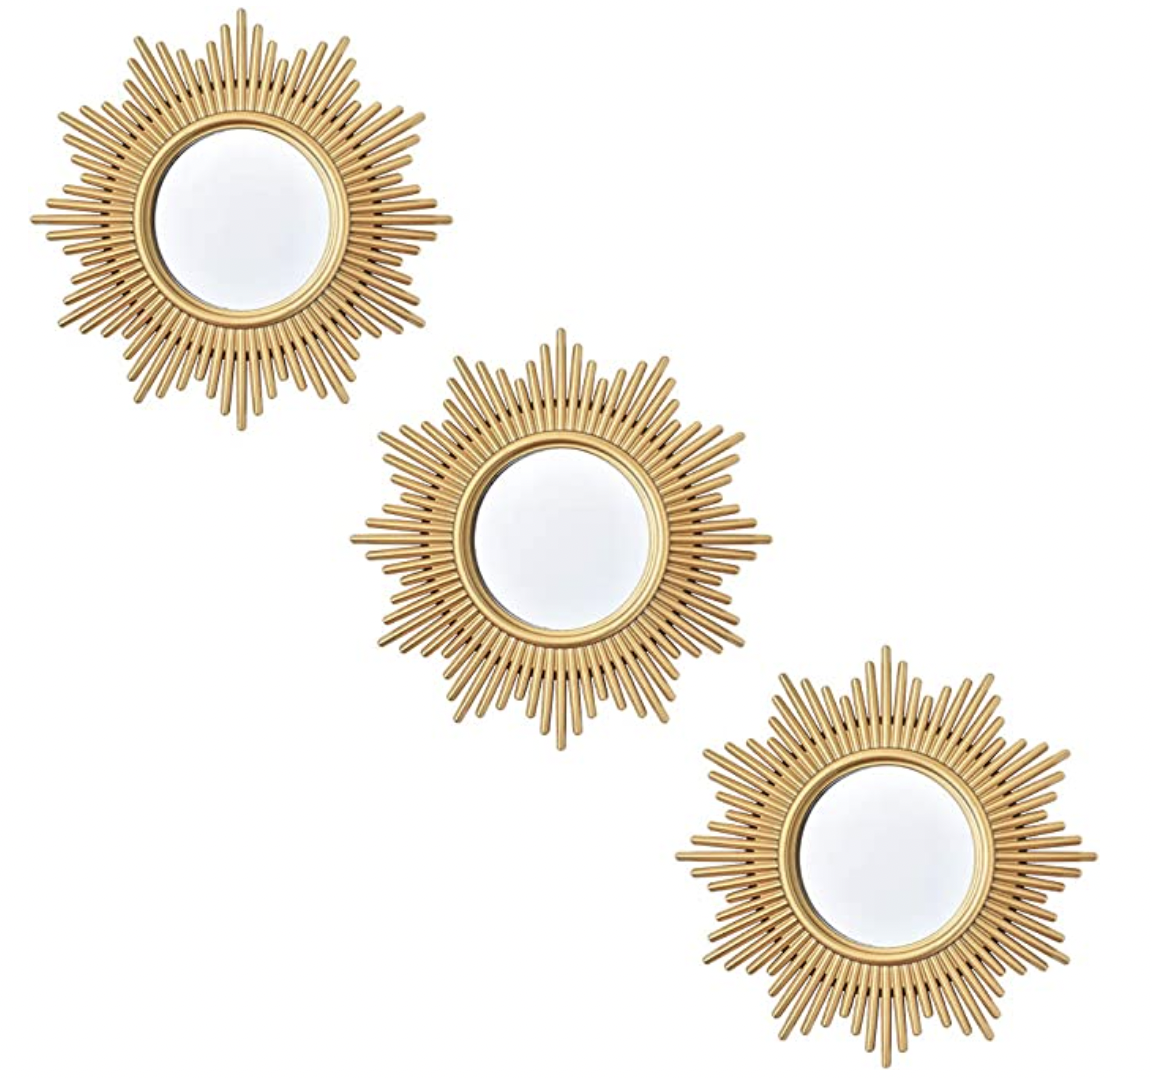
9. Hang a statement mirror
Adding strategically placed mirrors onboard can help reflect light and make your space feel much bigger. Consider hanging a mirror on the back wall of a saloon or a full-length mirror in a passageway. The challenge with mirrors is securing them well so that they don’t swing about on the wall when your boat rocks — so do check that the have the ability to be fastened at multiple points (a little foam adherence strip on the back also protects from rubbing). These mirrors below are a good size for use in a bulkhead or cabin wall, and can be well secured. And the gold looks so good with light fabrics.
Small gold mirror set of 3
Zenida round mirror

Bonus tip: Consider ventilation
Creating good ventilation and airflow below deck will ensure your interior space feel clean and fresh. Open hatches and check dorades are turned toward the wind to keep good air circulation — especially important while cooking and living aboard.
Painting FAQs
-
No. There’s quite a bit of prep work that goes into stripping back varnish and preparing the wood for painting. A paint specialist can recommend a good primer especially formulated for adhering to a previously varnished surface.
-
Use a wash and wear high quality interior paints designed for kitchens and bathrooms. These work well on a boat because they’re formulated to withstand humid or damp environments. These are highly durable, water resistant, anti-fungal and easily scrubbed clean for high-wear areas (most places onboard!). You’ll need to use a proper primer and with the correct number of undercoats to achieve a finish that will last well – especially if you’re painting over sanded varnish.
-
I’m dubious at the claims of some of those primers and paints. I’ve tried a few brands before hoping I could skip corners by not fully sanding the lacquer (just a light scuff only) but always regretted it. Within a few months I noticed a few scratches revealing varnish (even through many layers of paint). It’s hard not to bump walls when moving gear and living in a small space – so I recommend putting in the hard work up front and sanding back varnish really well before painting.
Make sure you wear excellent mask protection as varnish dust is toxic.
In Summary
You don’t have to have a huge boat, to live in a great space that feels good. I hope you’re inspired to use these easy ways to transform your interior spaces into areas that feel bigger and lighter. And do send me your boat interior makeover photos I’d love to see the before and afters!
Did you enjoy this article? Share it online and read more of the Journal…

For a tiny home and Pinterest lover a yacht is the perfect space to create your dream cosy home. Here are our 7 simple steps for giving your old boat interior a make-over on a $500 budget.